

Set up phone & voice
Get a phone number, configure voicemail, choose a routing strategy, and start taking calls in your browser.
What you'll set up
By the end of this guide, your business will have a working phone number that rings your team in-browser (or on their phones), records calls, takes voicemail, and sends follow-up texts for missed calls, all managed from the Signals dashboard.
Prerequisites
- A Signals account on any plan (voice is available on Core, Pro, and Enterprise)
- The Phone Setup wizard handles everything (no separate voice provider account needed)
Step 1: Get a phone number
- Go to Voice & Channels → Phone in the sidebar
- Click Set up phone to launch the wizard
- Search for an available number:
- Choose local (DID) or toll-free
- Filter by area code if you want a local presence
- Select a number and click Claim
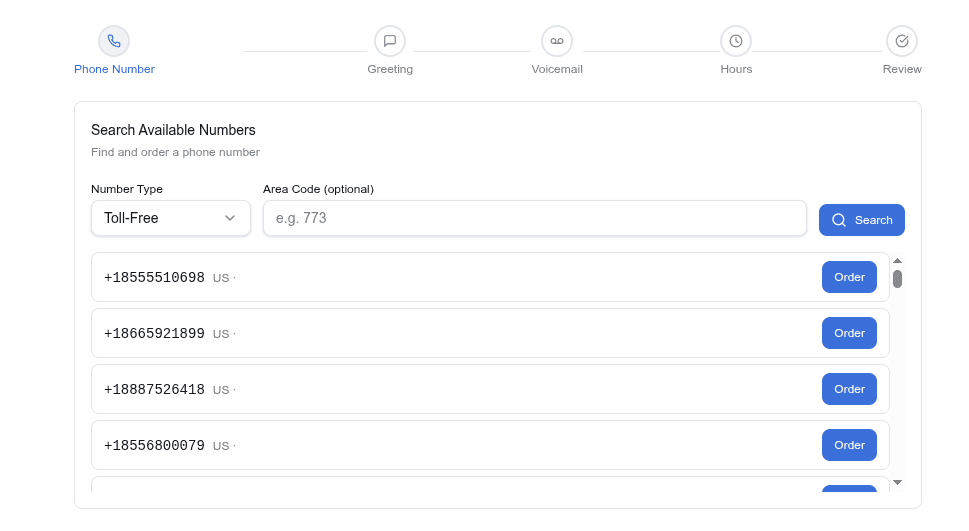
Your number is provisioned instantly. It's ready to receive calls as soon as you finish the setup wizard.
Step 2: Configure your welcome greeting
When a caller dials your number, they hear a greeting before being connected.
- Enter your greeting text (for example: "Thanks for calling Lakeside Dental. Please hold while we connect you.")
- Choose a voice from the dropdown (preview voices to find one that fits your brand)
- Optionally enable recording consent if your industry requires it (HIPAA, legal, etc.)
- The system plays a consent message before recording begins
- Callers who don't consent are still connected but not recorded
Step 3: Set up voicemail
If no one answers, the caller can leave a voicemail.
- Enable voicemail (toggle on)
- Enter your voicemail greeting text
- Choose a voice for the greeting
- Set max duration (default: 120 seconds)
- Enable auto-transcription to get voicemail text in the dashboard and notifications
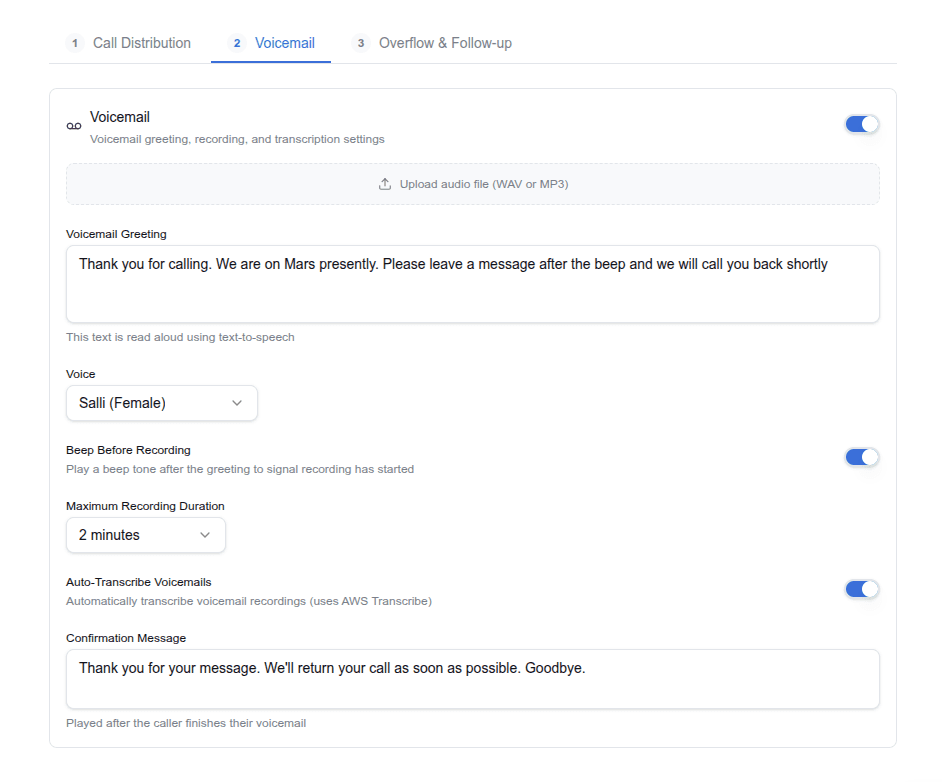
Voicemails appear in the Work Queue and trigger notifications if configured.
Reading out your current specials. Switch on Read out current offers and your live offers are spoken straight after the voicemail greeting, just before recording starts. Your greeting itself is untouched, including one you recorded. It is off unless you turn it on. See Manage current offers.
Step 4: Choose a routing strategy
The routing strategy decides how incoming calls are distributed to your team.
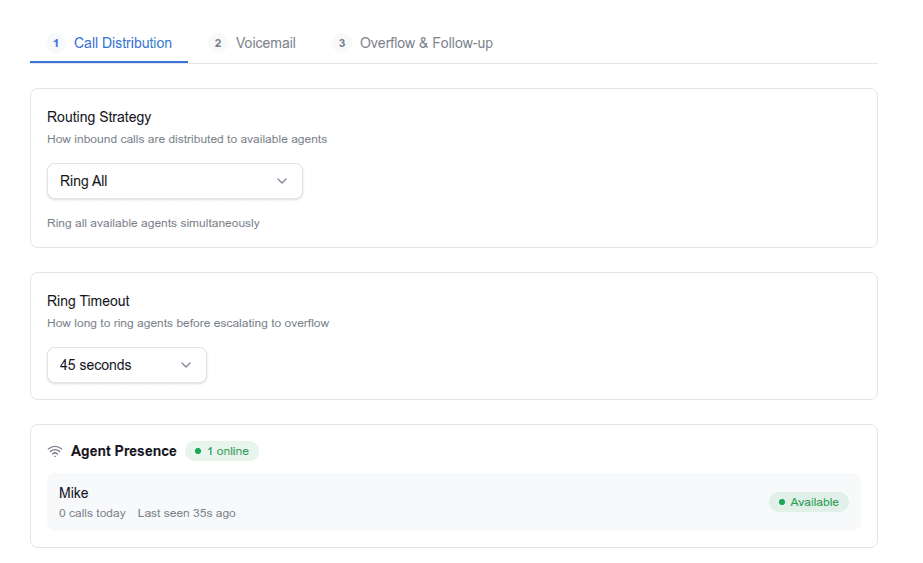
| Strategy | How it works | Best for |
|---|---|---|
| Ring All | All available agents ring simultaneously. First to answer wins. | Small teams where speed matters |
| Round Robin | Distributes calls evenly by daily call count. | Even workload distribution |
| Longest Idle | Routes to the agent who has been idle longest since their last call. | Fair distribution by actual activity |
Step 5: Choose who answers
On Call Routing → Call Distribution, the Who answers calls panel lists everyone on your account. Switch on the people who should answer your main line.
- Pick people from your team. They are added under Users first; you cannot type in a name that belongs to nobody
- Each person's row shows whether they can take a call right now—Ready, On a call, Wrapping up, Off duty, or Not signed in. Agents choose Ready and Off duty themselves; Signals sets the other two
- Only people who are Ready receive calls
To ring a phone with no Signals account—an answering service, or an on-call cell—add it as an outside number in the same panel. That is for phones outside your team, not a way to add a teammate.
Departments, if you need them
Underneath the main line you can create up to 20 departments—named lists like Billing or Scheduling, each with their own members and their own ring settings. An agent can then send a caller straight to one from the softphone.
Each department inherits the main line's ring timeout and rotation until you override them.
Being in a department does not put someone on the main line, and being on the main line does not put them in a department. That separation is what lets a call to Billing ring Billing and nobody else.
Step 6: Configure overflow
What happens when no one answers?
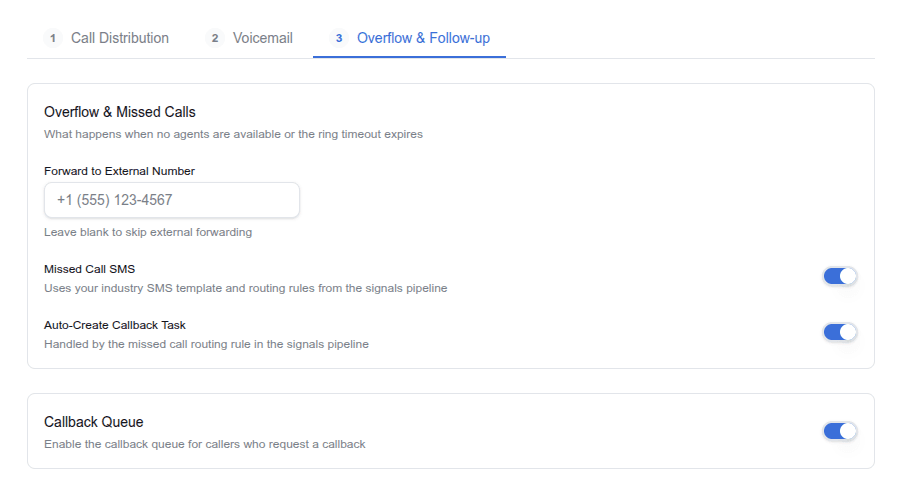
- Forward to external number: route unanswered calls to a backup line, answering service, or personal cell
- Missed-call SMS: automatically text the caller: "Sorry we missed your call. We'll get back to you shortly."
- Auto-callback task: create a task in the Work Queue so your team follows up
You can enable any combination of these.
Step 7: Set business hours for calls
The wizard includes a business hours step. Calls outside business hours can go directly to voicemail or play an after-hours greeting.
If you've already configured business hours in Settings → Business Hours, the wizard inherits those settings.
After-hours texts are sent from a template, and that template can carry your
current specials through the {{offers.current}} variable. You add the variable
yourself; it is not there by default. See
Manage current offers.
Step 8: Test with a real call
- Dial your new number from a personal phone
- Verify:
- Welcome greeting plays correctly
- Your softphone rings (or forwarded phone rings)
- Recording consent plays (if enabled)
- Voicemail works when you don't answer
- Missed-call SMS arrives (if enabled)
- Check the Call History page to see the test call logged
What's next
- Use the softphone: learn the in-browser phone controls
- Voice & Calls reference: detailed configuration reference for all voice features
- Manage notifications: configure call alerts on your mobile device
- Manage current offers: keep your specials in one place and have callers and texters hear them
Tips
- Start with Ring All if you have a small team. Switch to Round Robin or Longest Idle as your team grows.
- Enable auto-transcription for voicemails. It saves your team time and feeds voicemail content into the routing pipeline for AI classification.
- Test after every change. Dial your number after modifying routing, voicemail, or overflow settings to confirm behavior.
- Changes save automatically. After initial setup, edits to phone routing, voicemail, and overflow settings save as you make them.