

Organize contacts with tags
Group contacts for broadcasts, filtering, and follow-up using tags.
What are tags?
Tags are short labels you attach to contacts—like vip, dec-promo, follow-up-week-3, or lost-lead. They're how you group contacts for broadcasts, quickly filter the contact list, or track where someone is in your workflow.
A contact can have as many tags as you want, and tags are shared across your team—so if your receptionist tags someone needs-callback, everyone sees it.
Each tag gets a color from its own name, and keeps it everywhere it appears—the contact record, the tag directory, the audience picker. The color helps you spot a familiar tag at a glance. It does not identify one: colors come from a set of six, so two tags can share a color whether you have three tags or thirty. Read the name when it matters.
Add a tag to one contact
- Go to Contacts and click a contact to open their details.
- In the Tags area near the top, click the tag field.
- Pick from the list of tags you've used before, or type a new one and press Enter.
The tag appears as a chip on the contact. Click the × on a chip to remove it.
Add a tag to many contacts at once
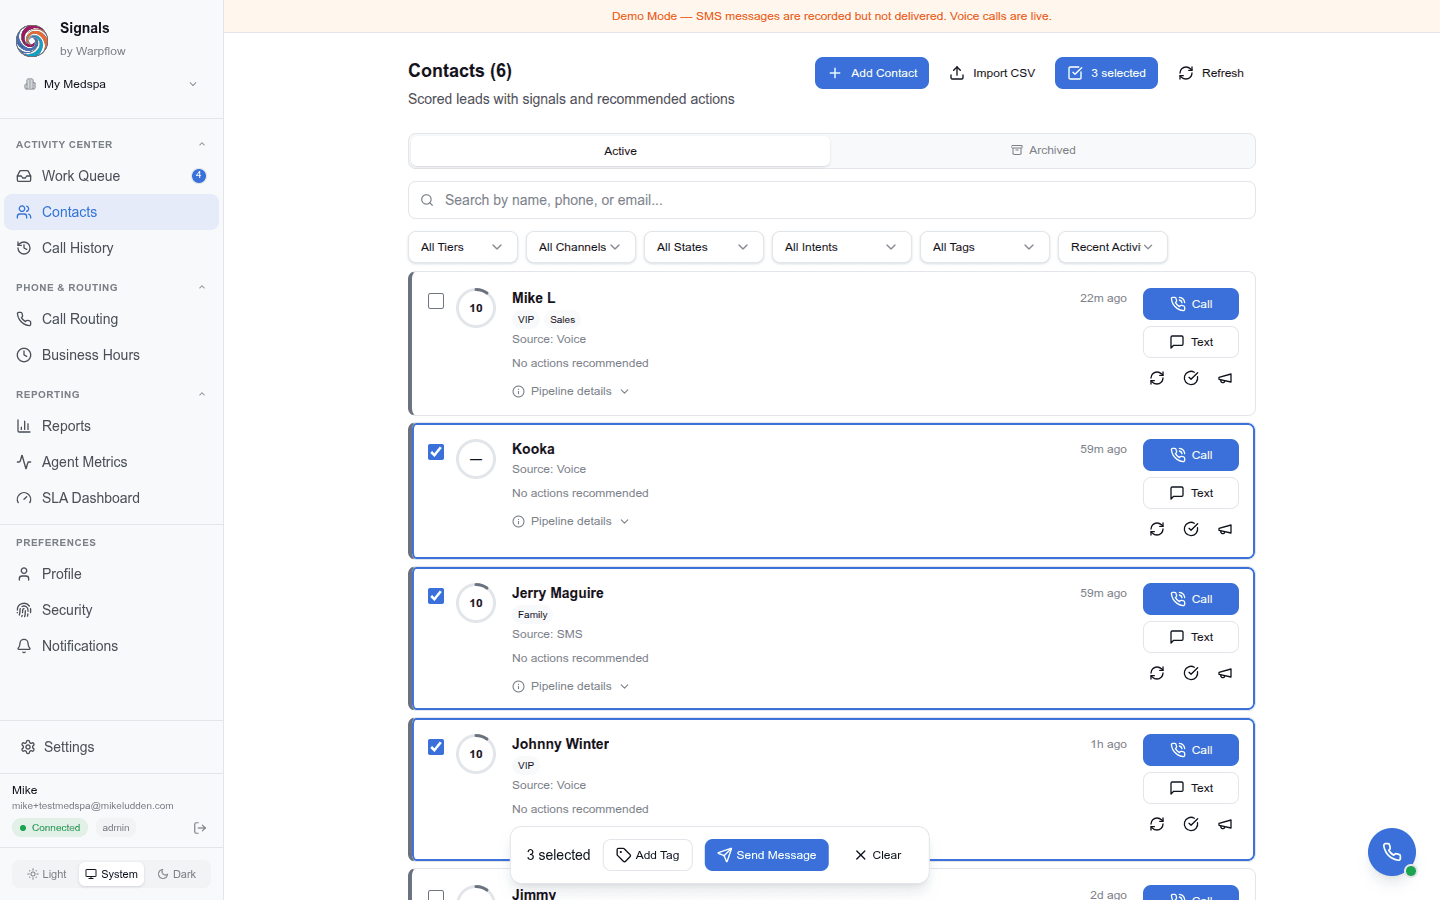
- On the Contacts page, click the Select button in the page header (the one with the checkbox icon). The page switches into selection mode and checkboxes appear on every contact card.
- Check the boxes next to the contacts you want to tag.
- A floating bar appears at the bottom with the text "N selected," an Add Tag button, and a Clear button.
- Click Add Tag and pick or create one. It applies to every selected contact at once.
To leave selection mode without tagging, click Clear in the floating bar or click the Select button in the page header again.
Filter the contacts list by tag
- On the Contacts page, open the Tag dropdown in the filter bar.
- Pick a tag. The list narrows to just contacts carrying it.
- A banner at the top of the filtered list tells you how many contacts match—and gives you a Send Broadcast button if you want to message all of them.
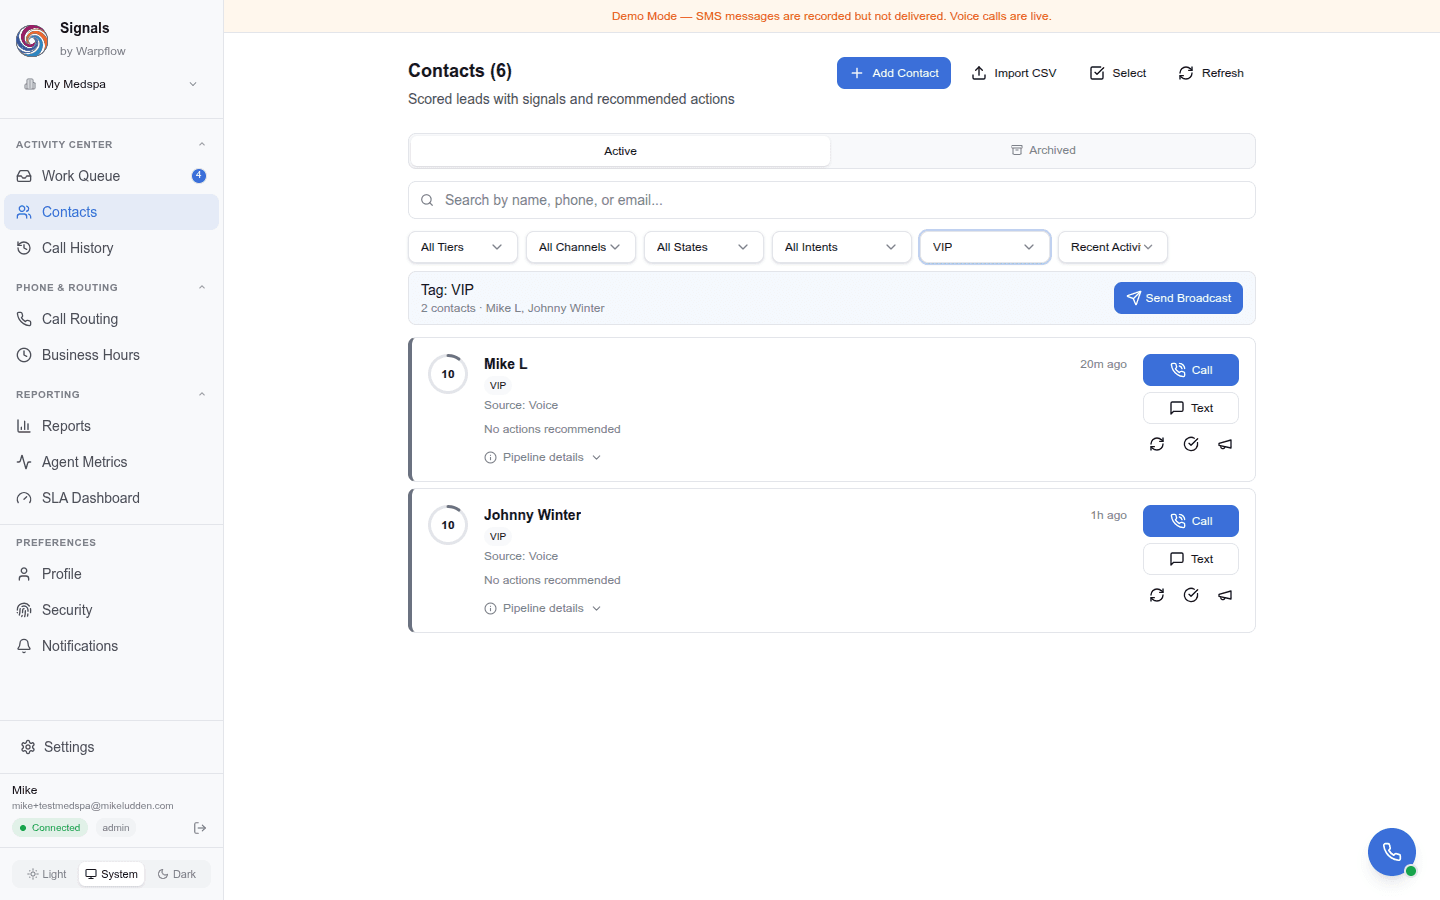
To clear the filter, click the × on the filter chip or pick All contacts from the dropdown.
Remove a tag from a contact
Open the contact's detail panel and click the × on the tag chip you want removed. The tag stays in your tag list for other contacts—you just take it off this one.
Naming tips
- Keep them short and consistent.
vipbeatsVery Important Person!!. - Use hyphens or underscores for multi-word tags (
new-lead,price_shopper). Spaces are allowed but less friendly. - Date-based tags (
jan-promo,2026-spring) are useful for time-bound campaigns. - Pipeline-stage tags (
discovery,quoted,won,lost) work well alongside your CRM stages.
Things to avoid
- Don't put sensitive information in tag names. Tags are organizational labels, not a place to store medical notes, financial details, or anything you wouldn't want visible in a contact list view. Use contact notes or the proper fields for that.
- Avoid near-duplicates like
follow-upandfollowupandfollow_up. They'll all show up separately in the filter dropdown and fragment your audience. Pick one convention and stick to it.
Build an audience from what people did
Tagging people one at a time works for a handful. When the group you want is "everyone who messaged us recently" or "everyone who never has," describe it instead and let Signals find them.
- Go to Contacts and click Manage Tags in the header.
- Click Build an audience.
- Choose what the group is based on:
- Has messaged us in the last N days—you set the number
- Has ever messaged us
- Has never messaged us
- Signals shows you how many contacts match before you commit to anything.
- Give it a name and click Create tag.
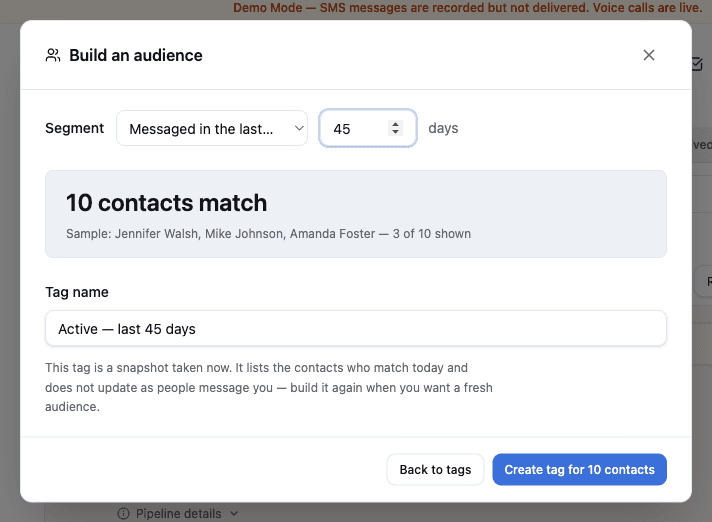
From there it is an ordinary tag. Filter by it, broadcast to it, and add or remove people by hand.
An audience is capped at 500 contacts. If yours is larger, Signals tells you rather than saving a partial list—narrow the window and try again, or tag in batches from the Contacts page.
Keep an audience current
A saved audience is a snapshot of who matched on the day you built it, not a live query. That matters most for a time-boxed group: "messaged in the last 30 days," built six weeks ago, is now a list of people who messaged you two months ago.
The tag's row tells you, in words: Built from "messaged in the last 30 days", 45 days ago.
- Click Refresh on that row.
- Signals re-runs the description and shows what would change:
N still match · N newly match · N no longer match. - Click Refresh again to apply it.
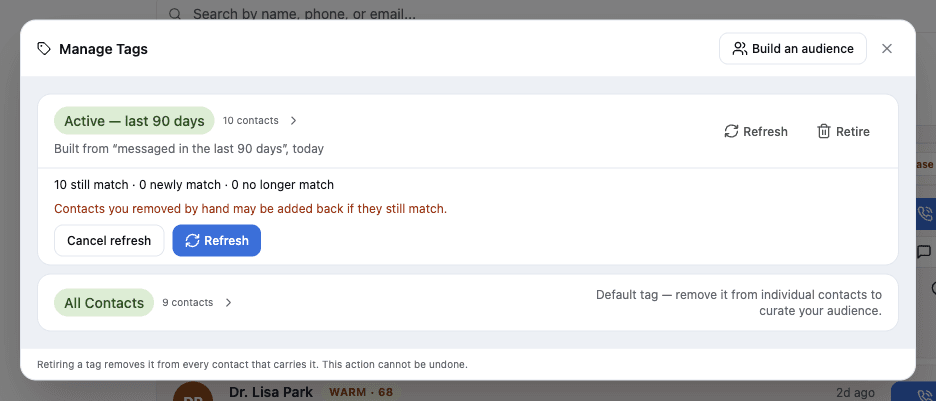
Refresh only adds people, unless you say otherwise. If some contacts no longer match, you get a checkbox—Also remove the N who no longer match—and it starts cleared. That is deliberate: you may have added people to this tag by hand, and a refresh that quietly removed them would undo your work without asking.
Retire a tag
If your tag list becomes cluttered over time—old campaigns, typos, one-off experiments—you can retire a tag and have it cascade-removed from every contact that carries it.
- Open the Contacts page.
- Click Manage Tags in the header.
- Find the tag to retire—each row shows the tag name and the number of contacts using it, sorted by count (most used first). A tag built from an audience also shows what it was built from, and when.
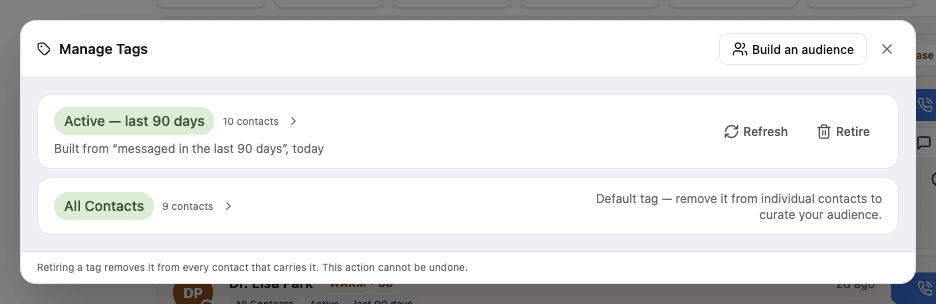
- Click Retire on the row. A confirmation appears below it showing how many contacts are affected.
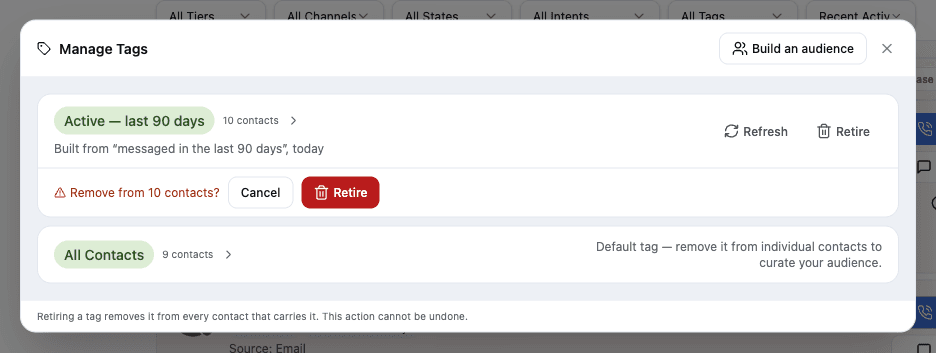
- Click Retire again to cascade-remove.
Retired tags disappear from the filter dropdown, the tag picker autocomplete, and every contact's chip list. The operation is audit-logged for HIPAA compliance, but cannot be undone—if you need the tag back, re-tag the affected contacts.
Retire is capped at 1,000 affected contacts per operation. If you need to retire a tag on a larger set, contact support.
Admin-only: retiring a tag requires the admin role.
See also
- Send a broadcast SMS—target a broadcast at a tagged group, including one you built as an audience
- Manage contacts & leads—the Contacts page, importing, and the contact detail panel